





Four Steps in This Guide
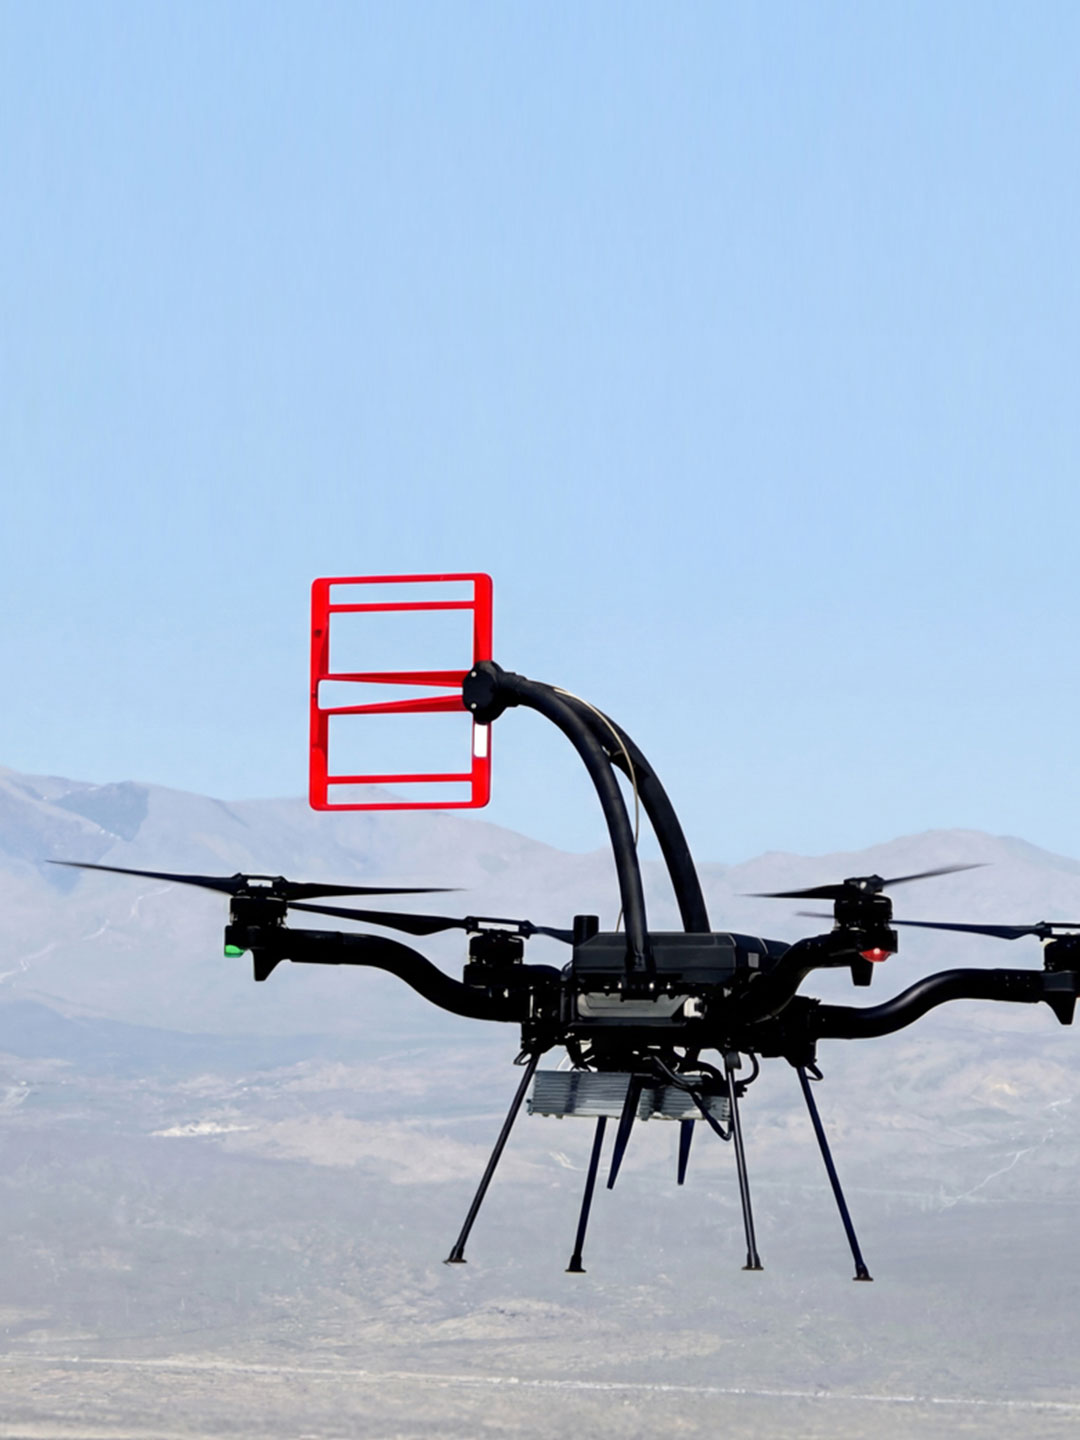
This guide introduces the basic steps for using the HAROGIC R1090 RF receiver on Windows and developing applications in Python. In this application, the HAROGIC T1060 RF signal generator provides reference signals for testing.
- Download and install the software
- Connect the hardware
- Verify the software and hardware connection
- Run the examples
Prerequisites
- Software: Python 3.12, SAStudio 4.5.50 or later, SGStudio 2.6.4 or later, the Python examples for the HAROGIC R1090 RF receiver, and HTRA API 0.55.89 or later
- Hardware and accessories: A Windows 11 computer, an antenna, a HAROGIC R1090 embedded RF receiver, a HAROGIC T1060 embedded RF signal generator, and an SMA cable
1 Download and Install the Software
1.1 Install Python
Download the Python installer for your version of Windows from https://www.python.org/.
Run the installer and select Add Python to PATH.
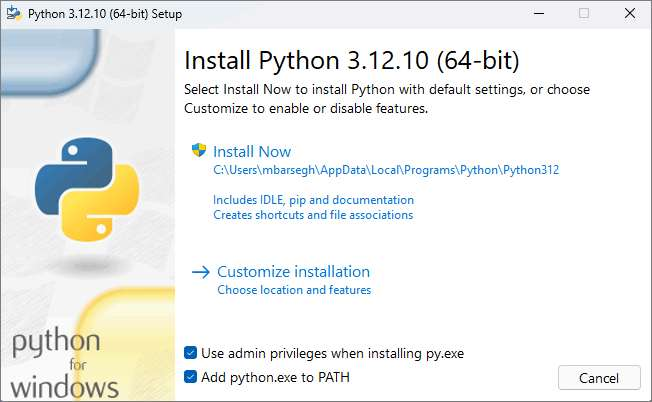
Restart the computer after installation.
Upgrade pip by running the following command:
py -3.12 -m pip install --upgrade pip
Verify the installation at a command prompt:
py -3.12 --version
1.2 Install Visual Studio Code
Download the Windows installer from https://code.visualstudio.com/docs/setup/windows. When installation is complete, open Visual Studio Code.
Select the Extensions icon in the left sidebar, search for Python, and install the Python extension published by Microsoft.
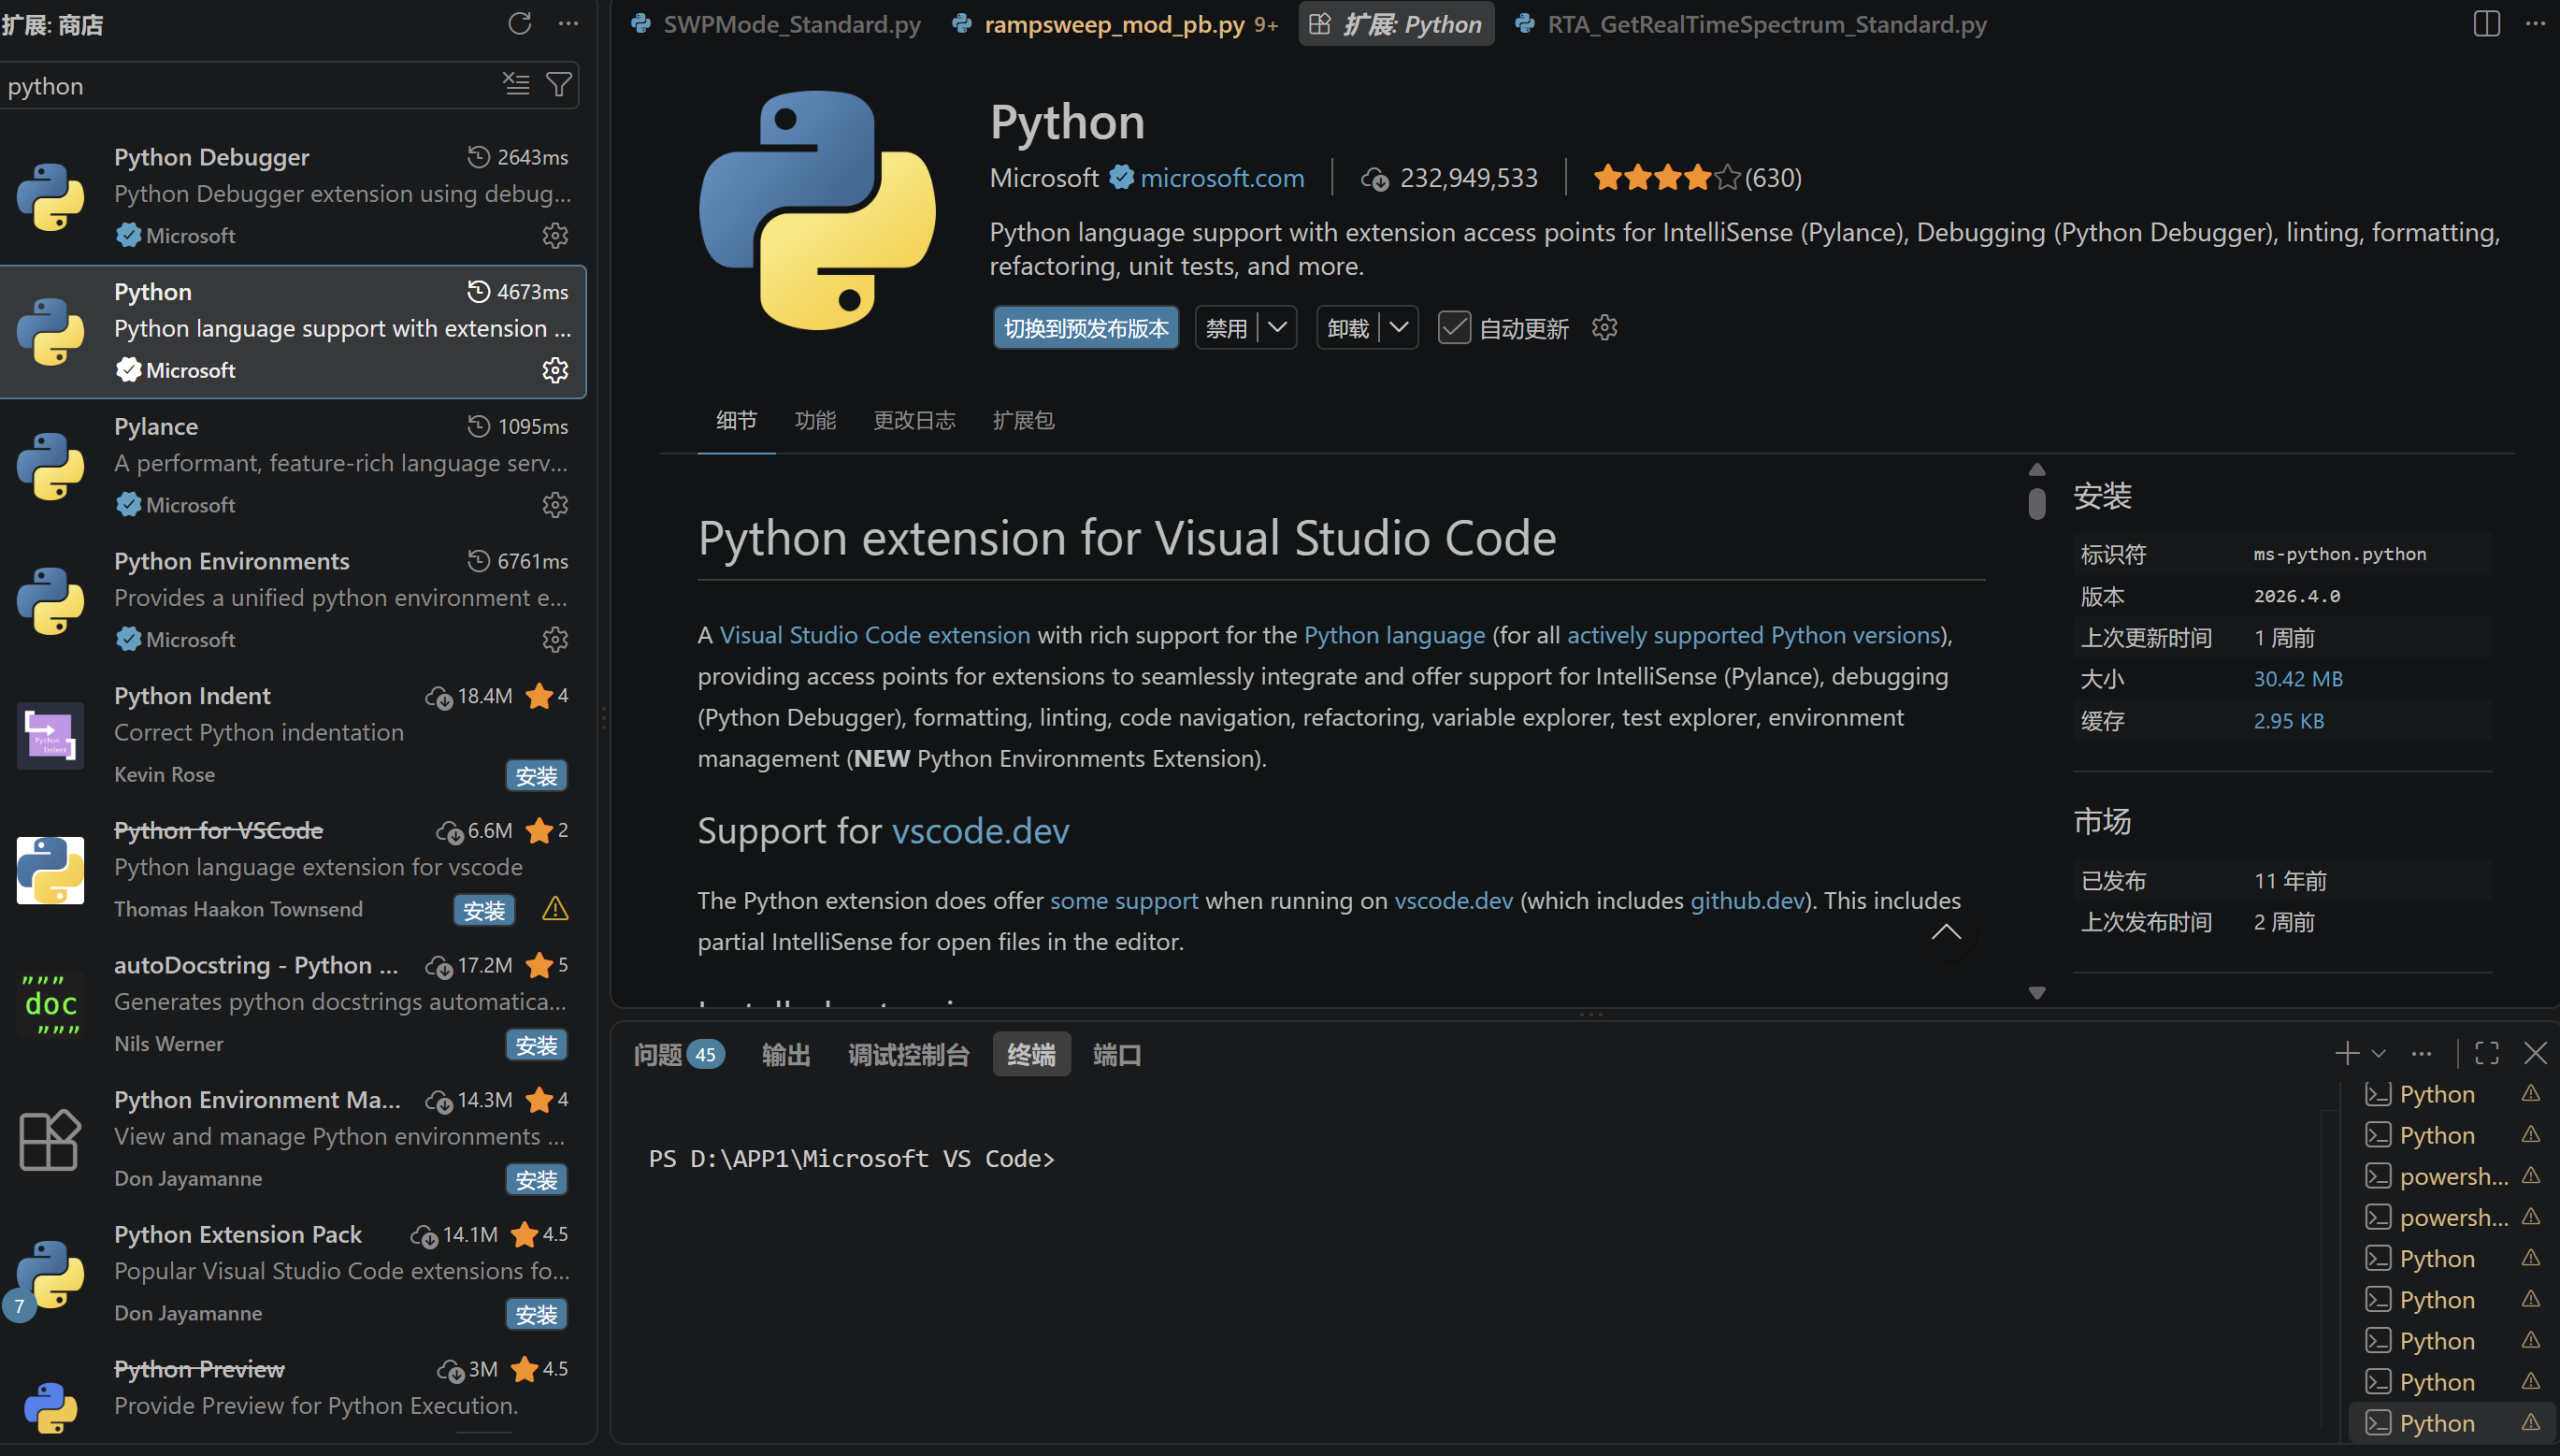
Open Visual Studio Code and press Ctrl + Shift + P. Enter Python: Select Interpreter, then select the Python 3.12 interpreter installed above. Visual Studio Code is now ready to run the Python examples in this guide.
1.3 Install SAStudio
Extract SAStudio_Windows_x64_4.4.55.50. The application is located in the bin directory.
1.4 Install SGStudio
Extract the SGStudio_Windows_x64_2.6.4 folder and launch SGStudio from the bin directory.
1.5 Download the Python Examples
The code used in this guide is located in the Python Examples folder. Download it from https://www.harogic.cn/windows-sdk/.
The following examples are used:
SWP_Persistence_R1090.pySWP_Persistence_R1090_T1060.pySWP_Waterfall_R1090.pySWP_Waterfall_R1090_T1060.pySWPMode_Standard.py
2 Connect the Hardware
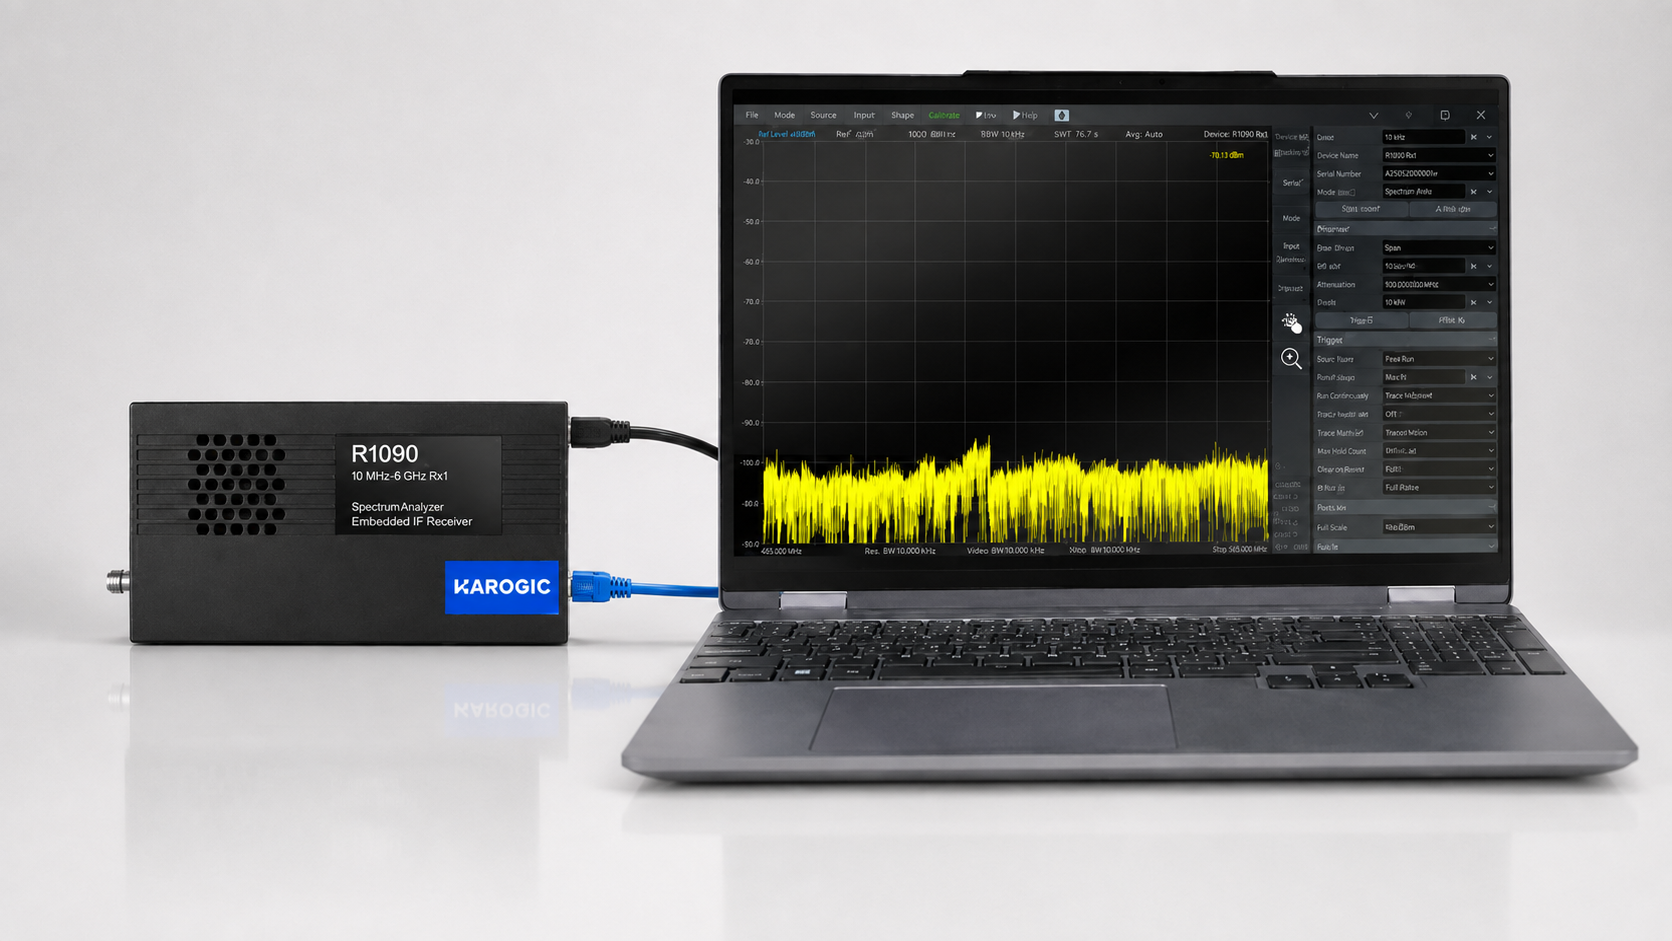
2.1 Connect the R1090 to the Computer
Power the R1090 with the power/data cable, connect it to the computer with an Ethernet cable, and configure the Windows network settings.
- Open Windows Settings, then select Network & Internet > Ethernet.
- Under Ethernet, locate IP settings and select Edit.
- Select Manual, enable IPv4, set the IP address to
192.168.1.102, and set the subnet mask to255.255.255.0. - Open Command Prompt and run
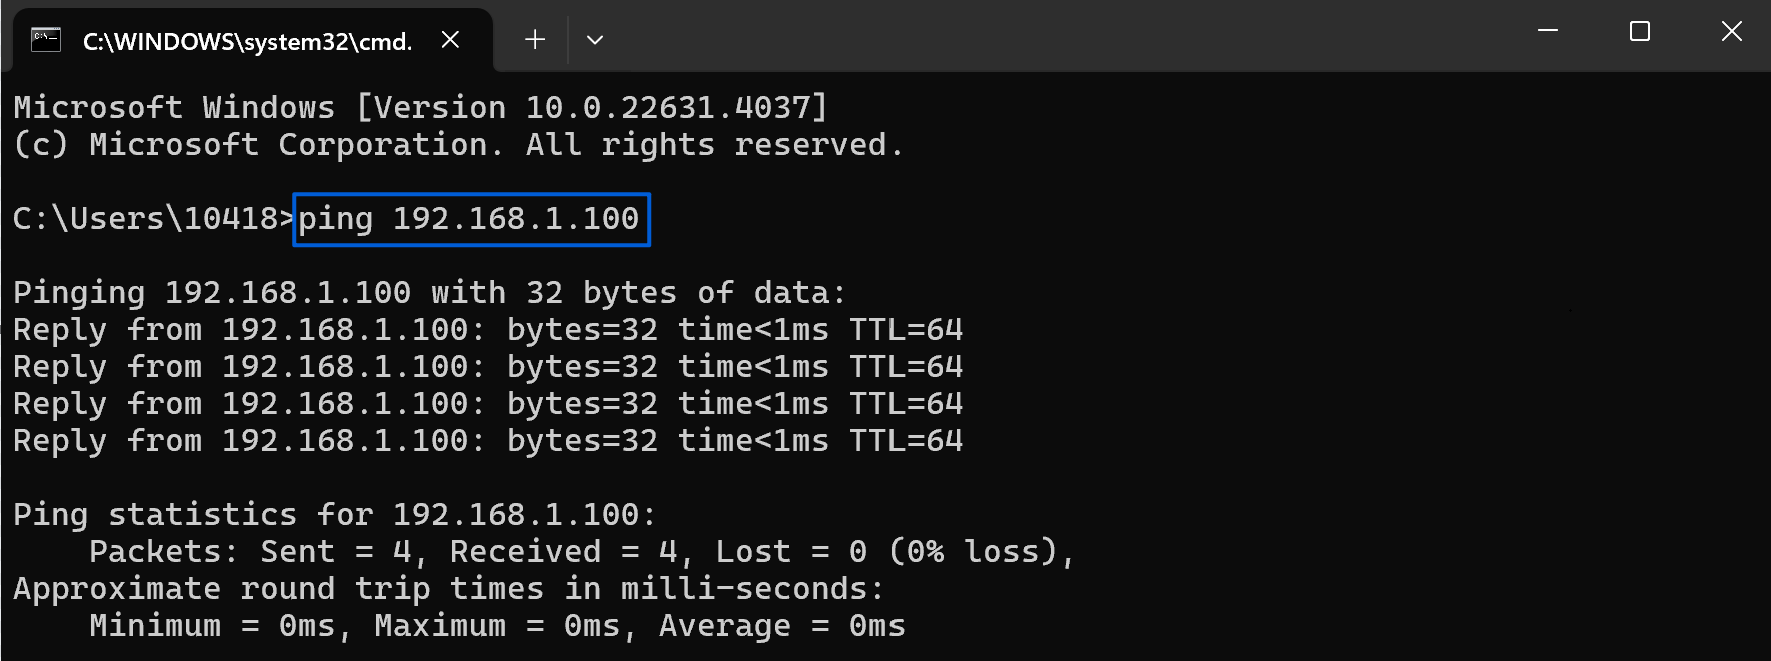
ping 192.168.1.100. Replies from the device confirm that the network connection is working.
In SAStudio, select System > About to view the device UID and the software and firmware versions.
2.2 Connect the Antenna
Connect an antenna to the R1090 RF input to observe the received spectrum when no signal generator is connected.
2.3 Connect the HAROGIC T1060 RF Signal Generator
Disconnect the antenna from the R1090 RF input, if connected, and use an RF cable to connect the T1060 to the R1090.
CAUTION: Before connecting the T1060 to the R1090, confirm the T1060 output power, the maximum permissible input level of the R1090, and whether an external attenuator is required.
With the relevant option installed, the T1060 can deliver up to 25 dBm, which exceeds the maximum permissible input level of the R1090 and may damage the receiver. The maximum output power at the standard T1060 RF output varies from 7 to 14 dBm. Do not connect the T1060 medium-power output to the R1090 because it can damage the receiver. Start with the T1060 output level set to -10 dBm and adjust it as required during the test.
3 Verify the Hardware Connection
Double-click SAStudio. The application normally opens directly in run mode. If SAStudio reports an error because the previous connection used USB, dismiss the message, select System > Device Connection, and choose ETH. SAStudio will automatically detect the R1090 IP address and connect to the device.
4 Run the Examples
- Open Visual Studio Code. Select File > Open Folder, then select the downloaded
HTRA_Python_Examplesfolder. - Open a terminal before running the scripts.
- Install or update the required packages:
py -3.12 -m pip install -U numpy matplotlib
Note: Before running the scripts, understand the key parameters that affect receiver performance: RF frequency, IQ sample rate, and gain.
4.1 Connect the Antenna
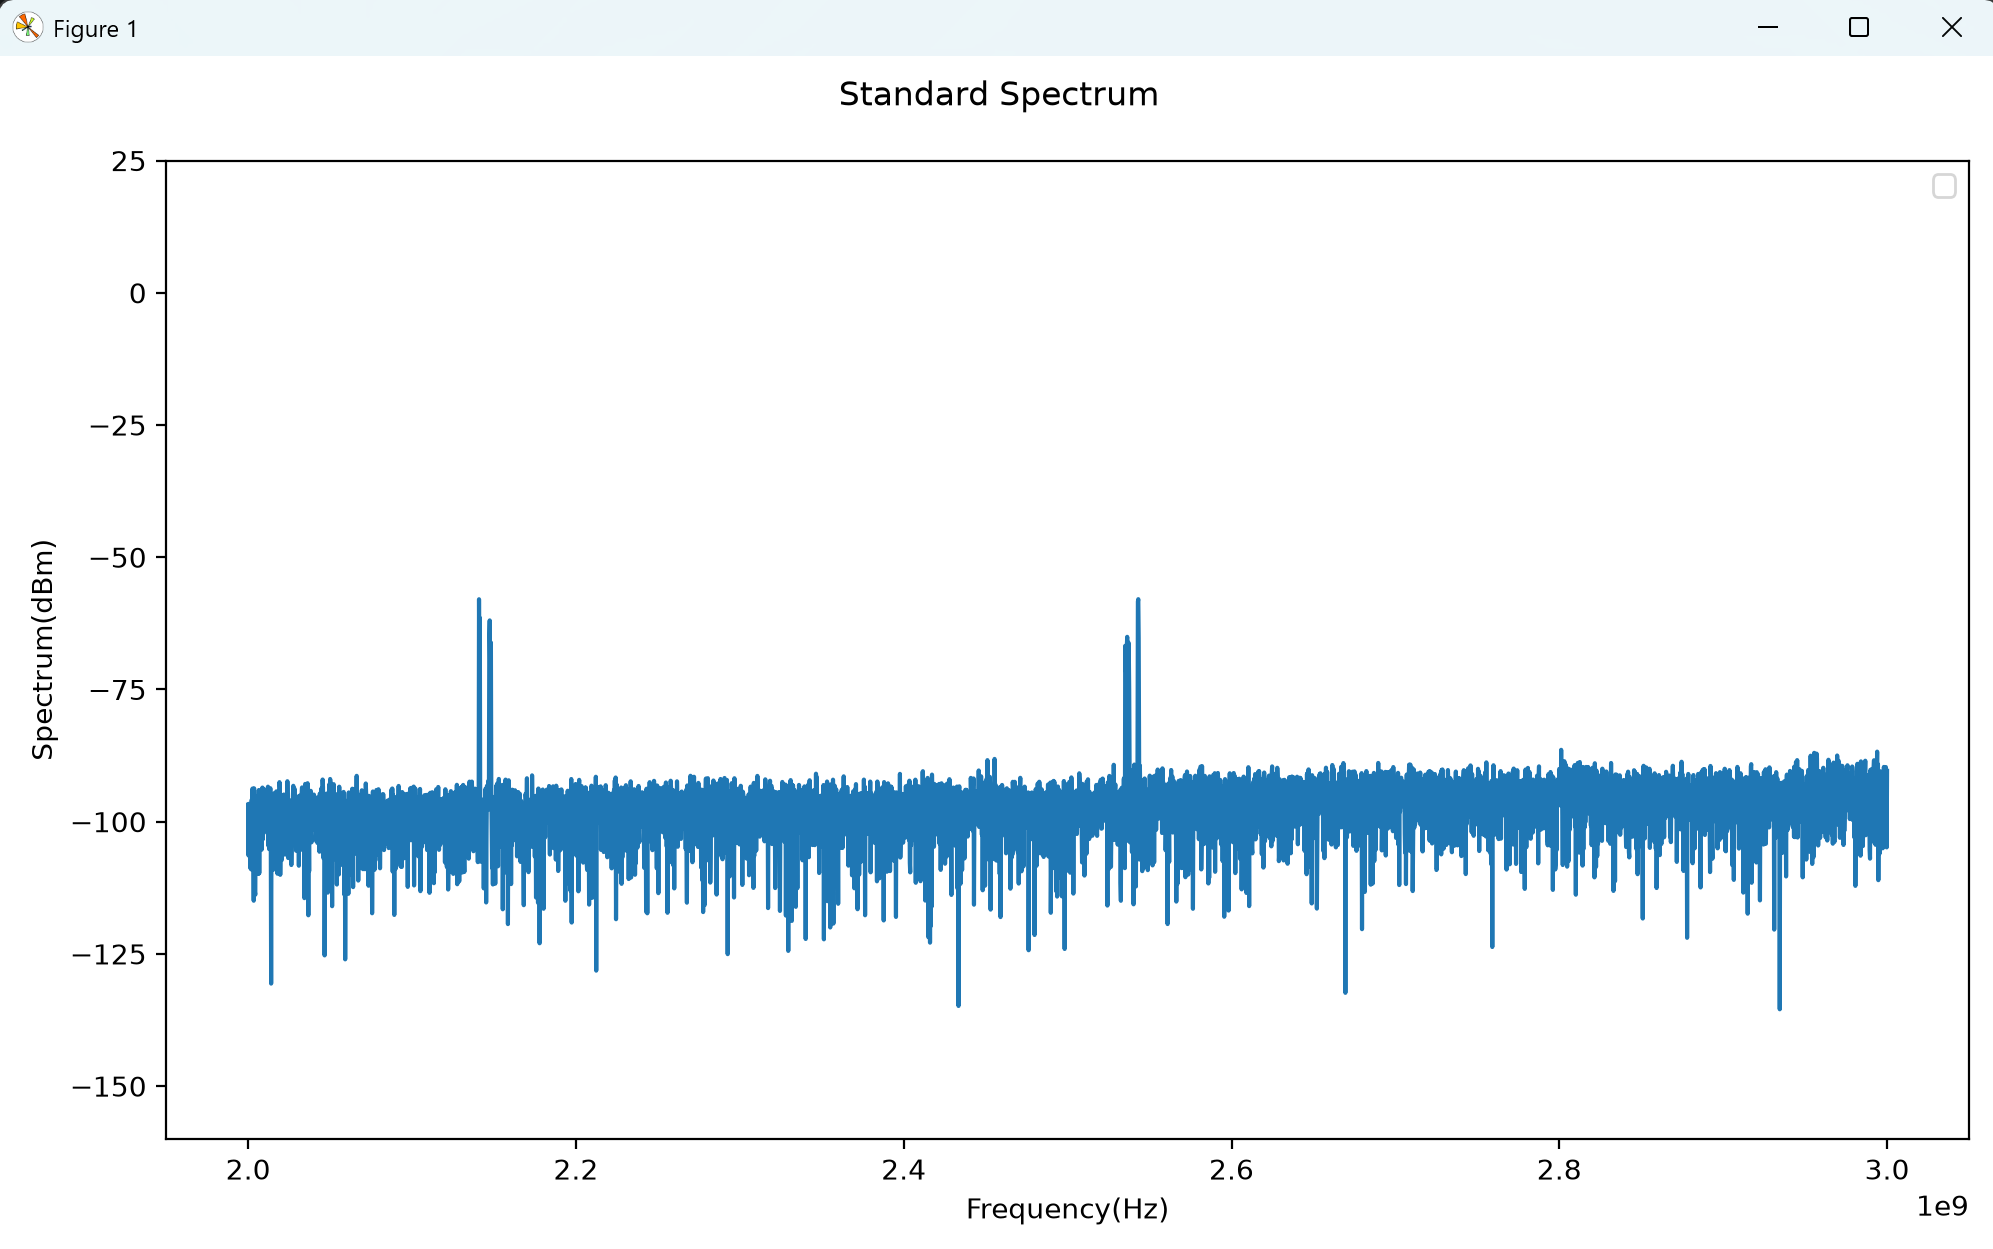
Run SWPMode_Standard.py first to verify communication with the device. A typical result is shown below.
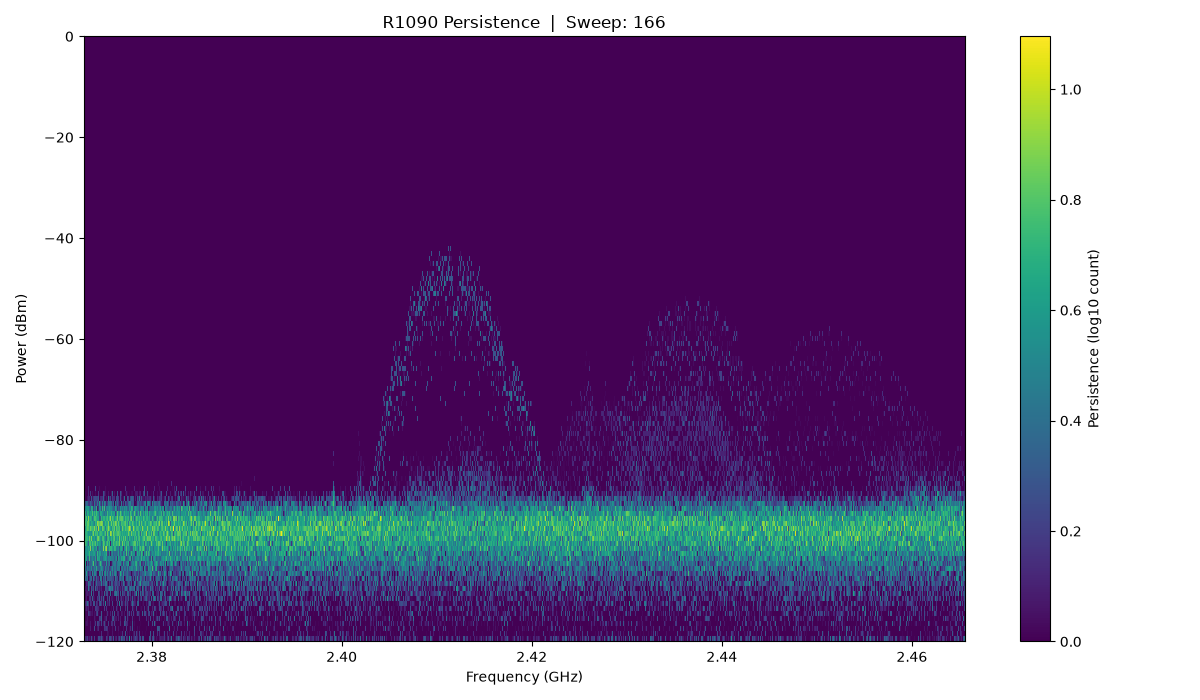
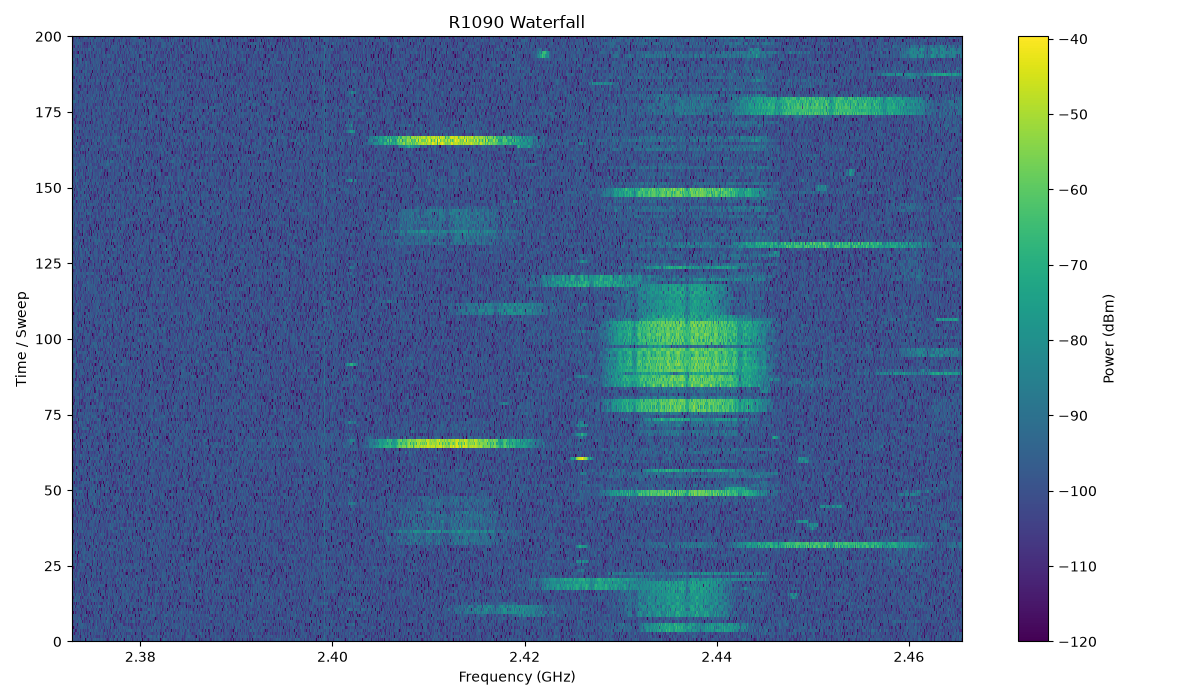
After the device connects successfully, run SWP_Persistence_R1090.py and SWP_Waterfall_R1090.py to display the persistence and waterfall plots.
py -3.12 "C:\Users\<username>\<path-to-file>\SWP_Persistence_R1090.py"
py -3.12 "C:\Users\<username>\<path-to-file>\SWP_Waterfall_R1090.py"
4.2 Connect the T1060 RF Signal Generator
4.2.1 Generate Signals in SGStudio and Observe in SAStudio
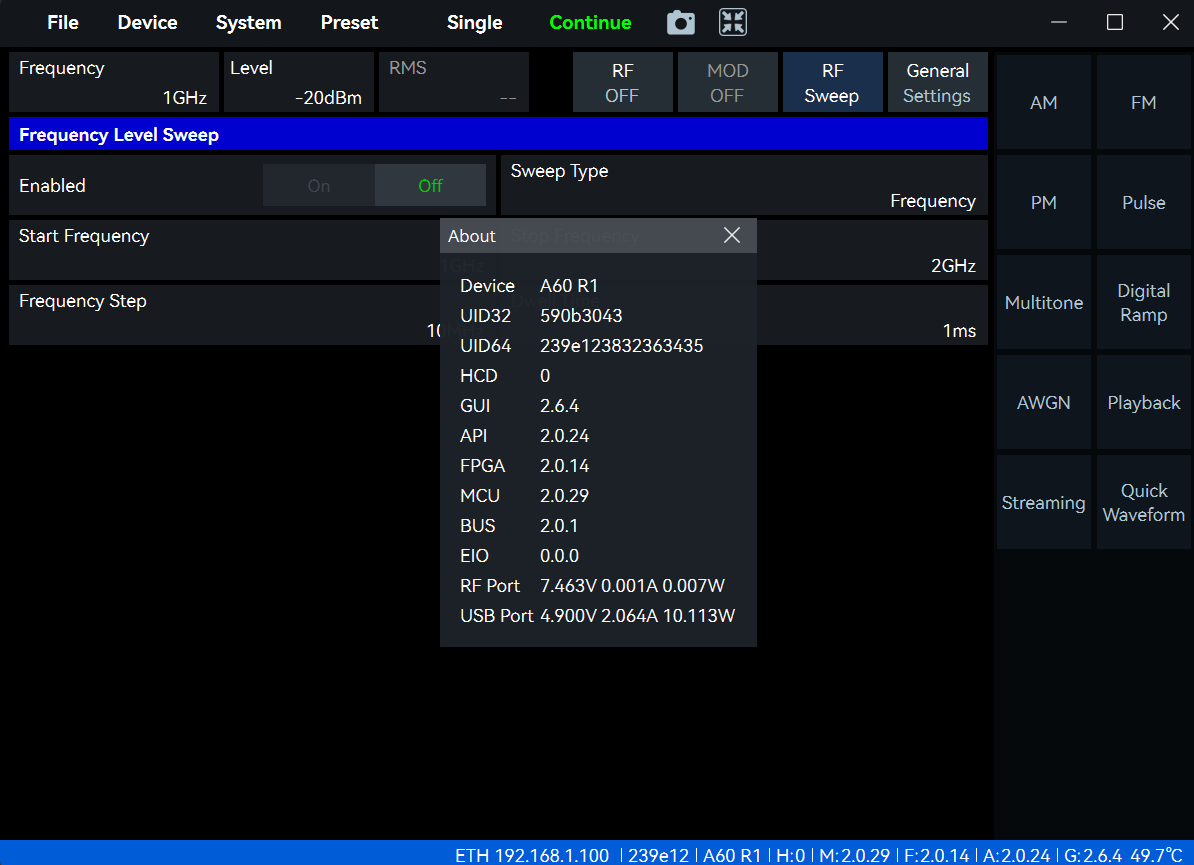
Open SGStudio and select System > About to view the device UID and the software and firmware versions.
In the mode selection panel on the right, select Quick Waveform. Select the required waveform file, load and enable it, then enable the RF and modulation outputs.
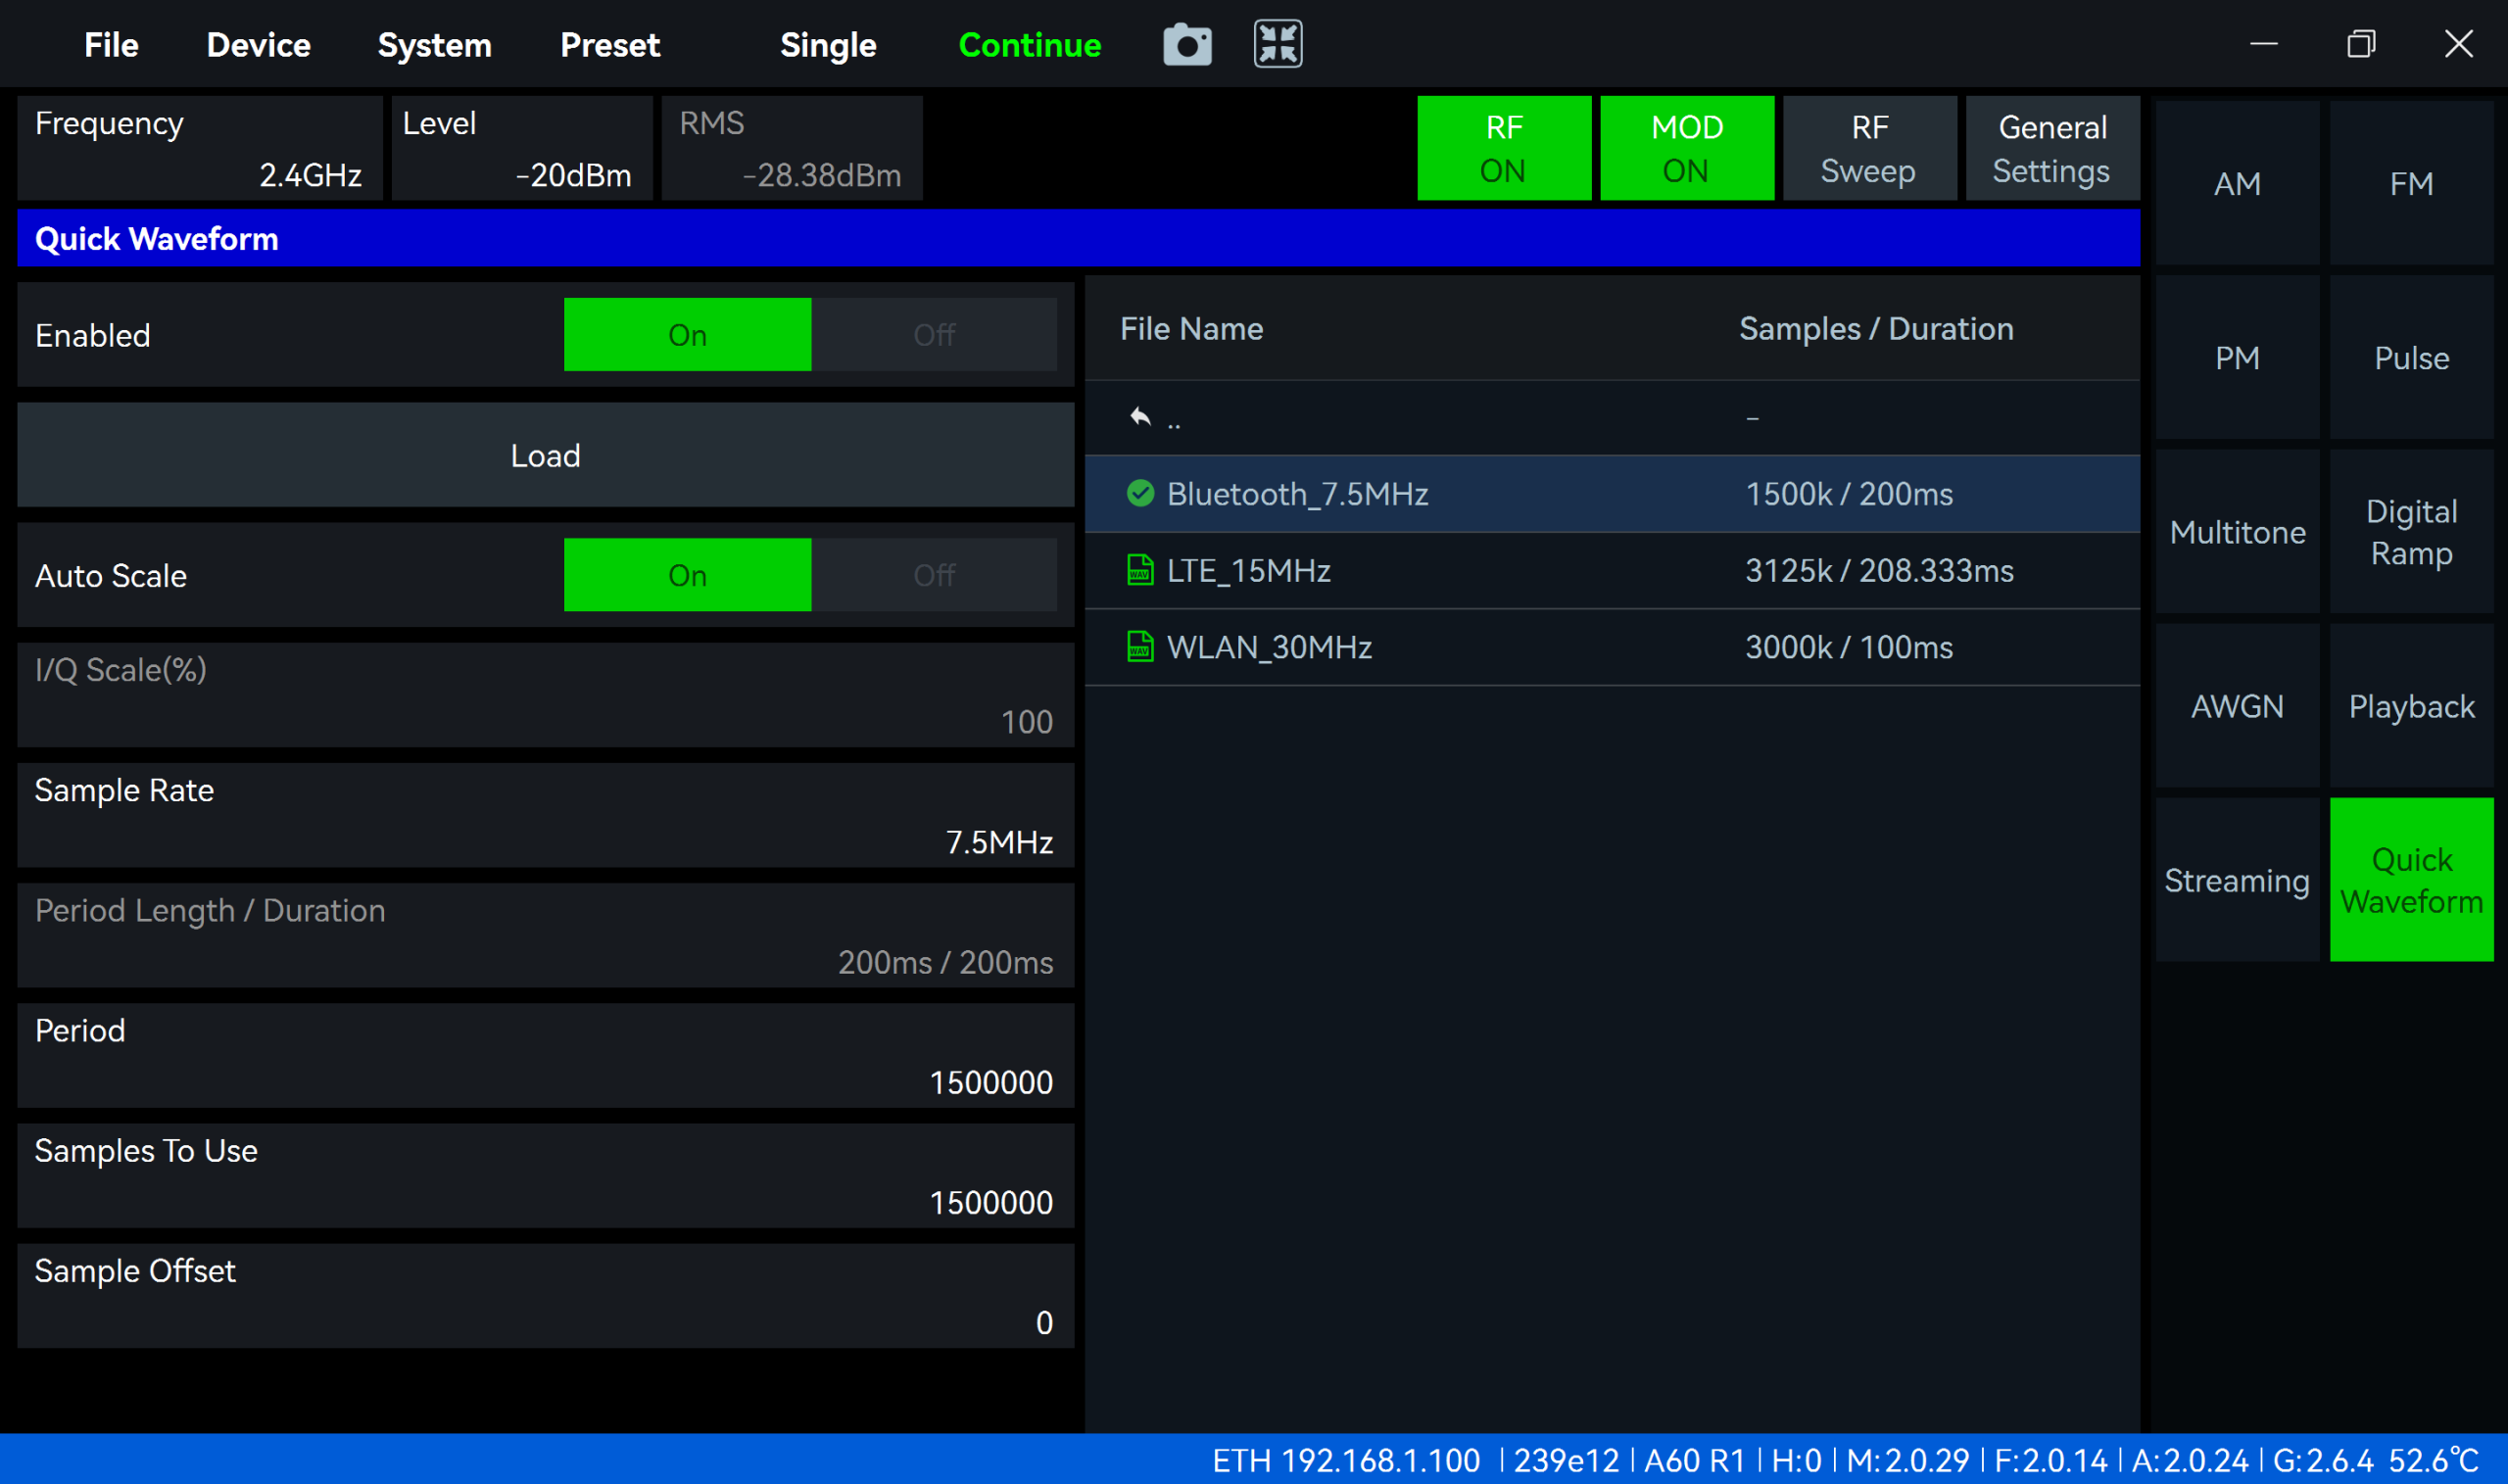
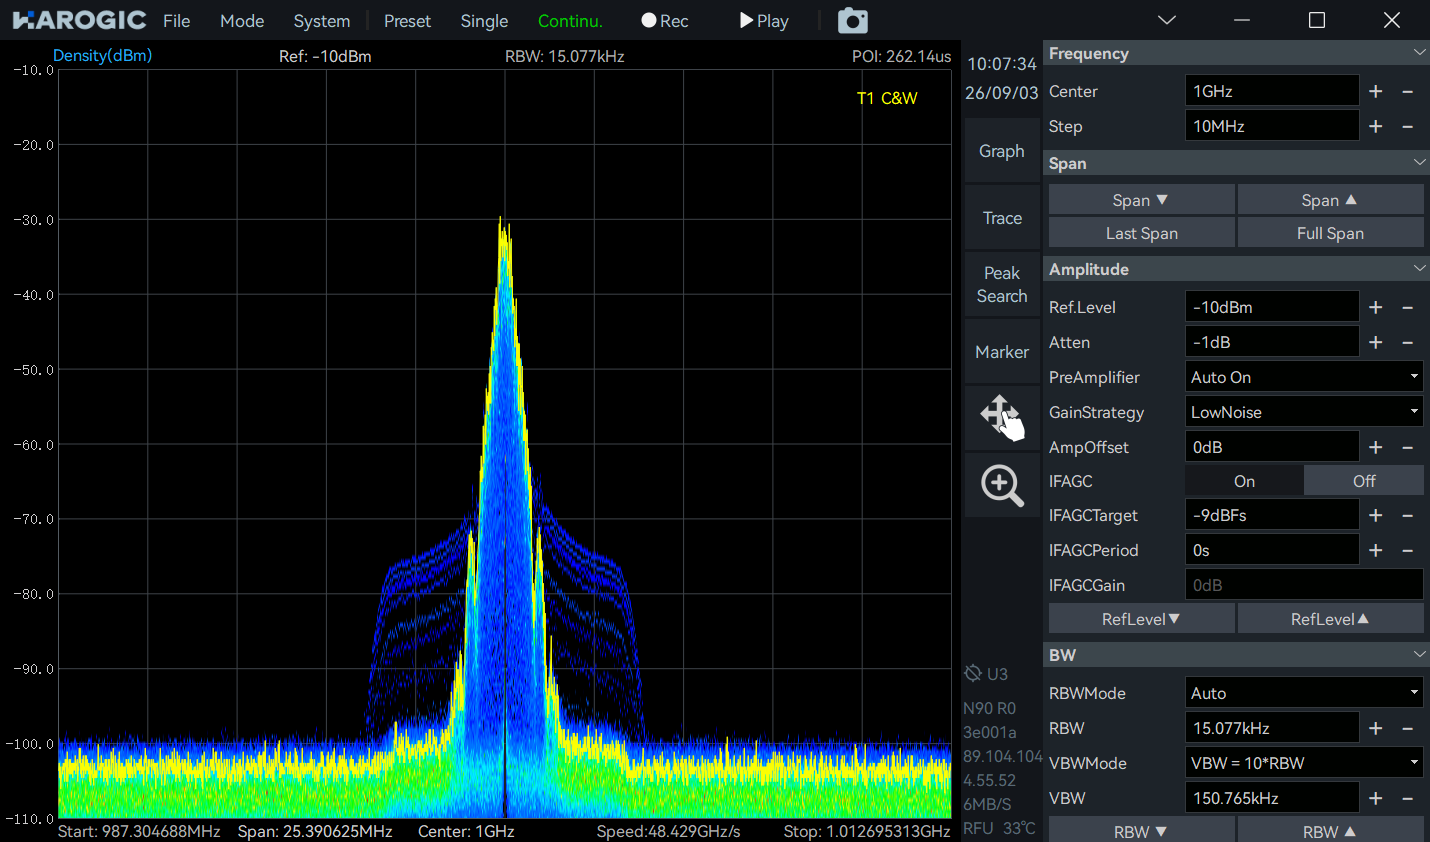
For a Bluetooth signal, select the Bluetooth_7.5MHz file and choose Load File. Enable the RF output and use SAStudio to view the spectrum, persistence, and waterfall displays, as shown below. Adjust the persistence intensity under Graph > Persistence.
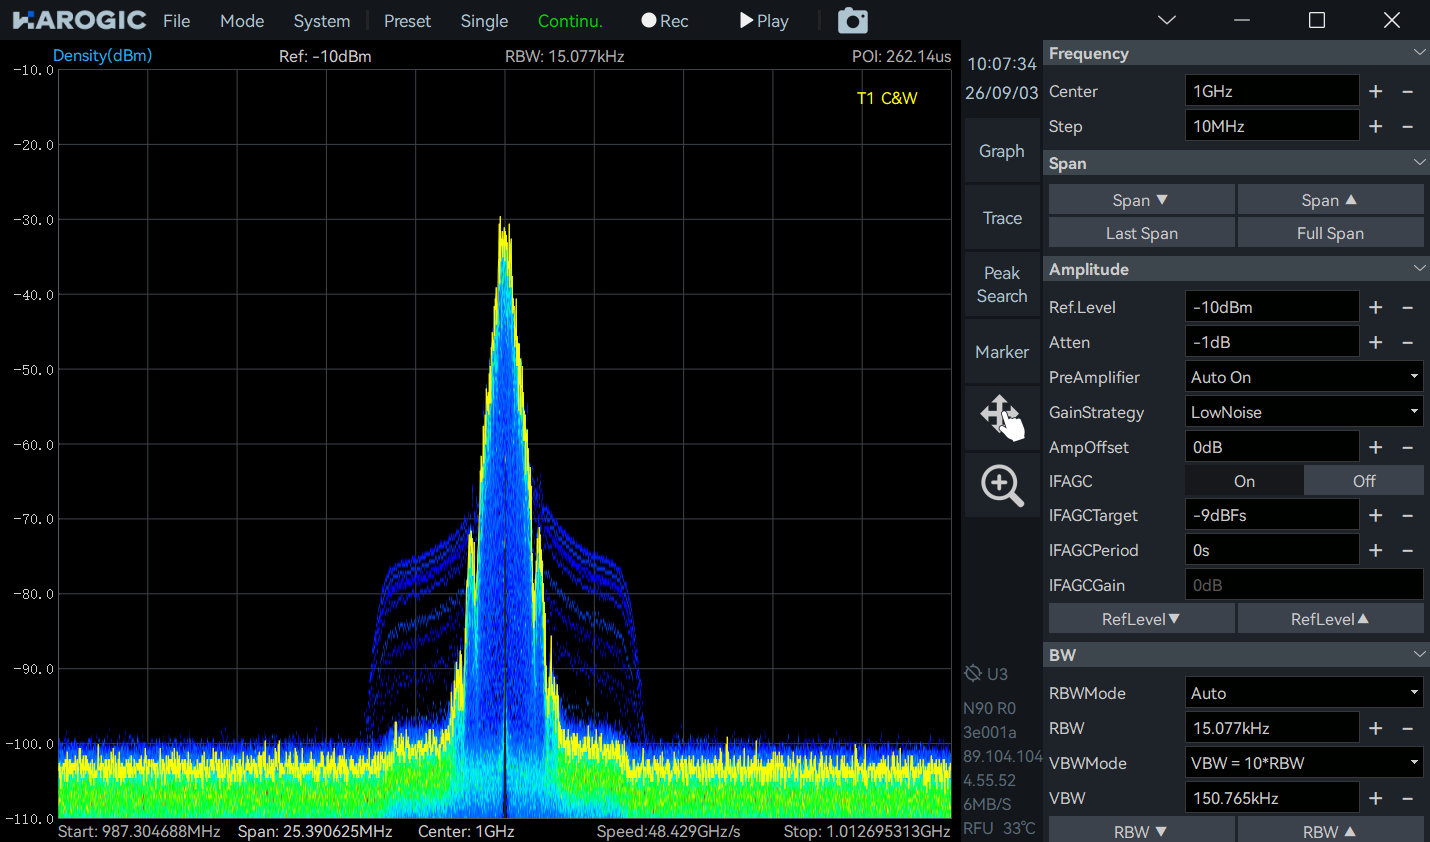
For a Wi-Fi signal, select the WLAN_30MHz file and choose Load File. Enable the RF output and use SAStudio to view the spectrum, persistence, and waterfall displays, as shown below. Adjust the persistence intensity under Graph > Persistence.
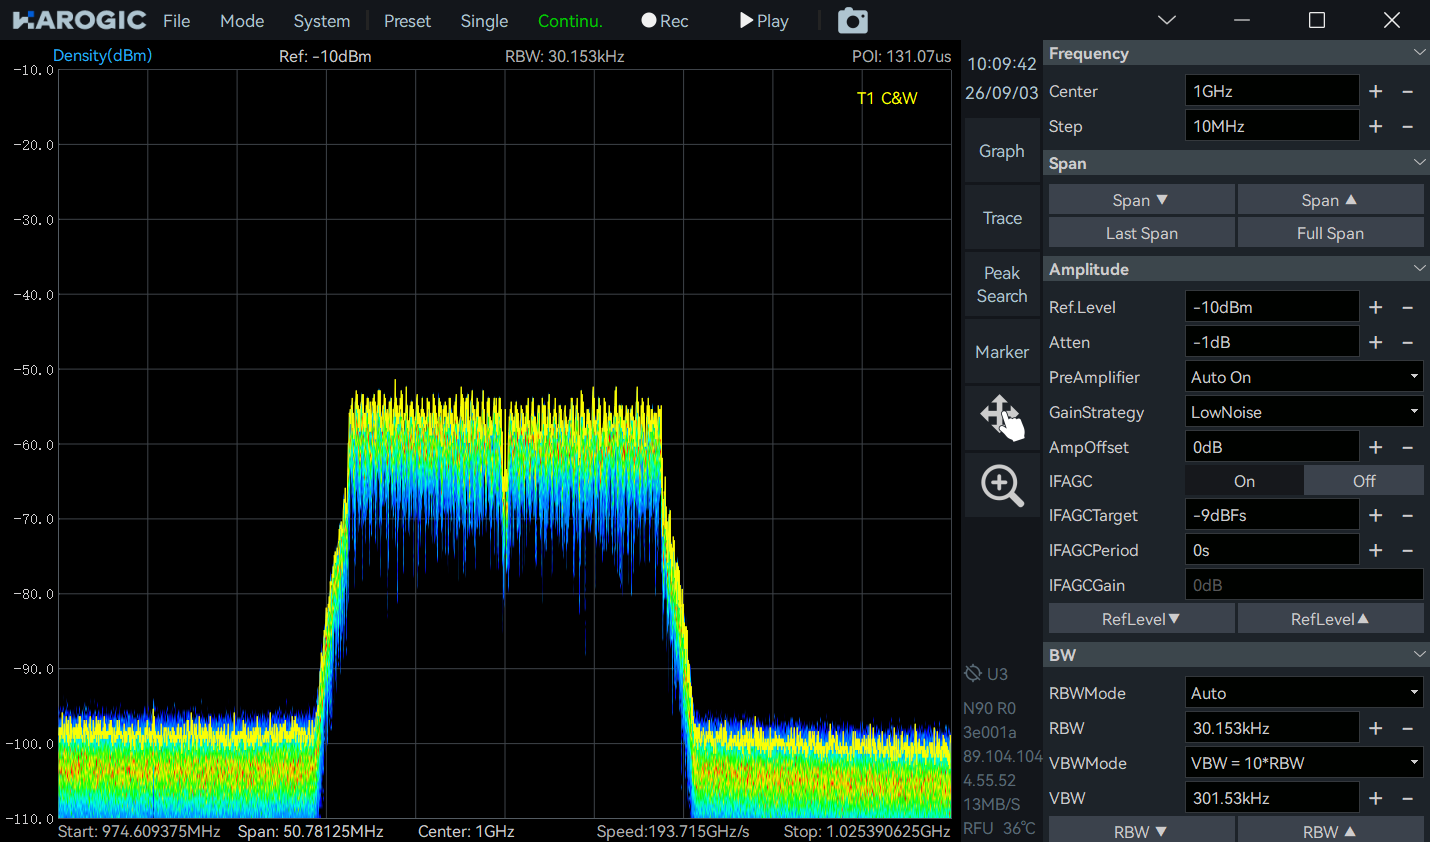
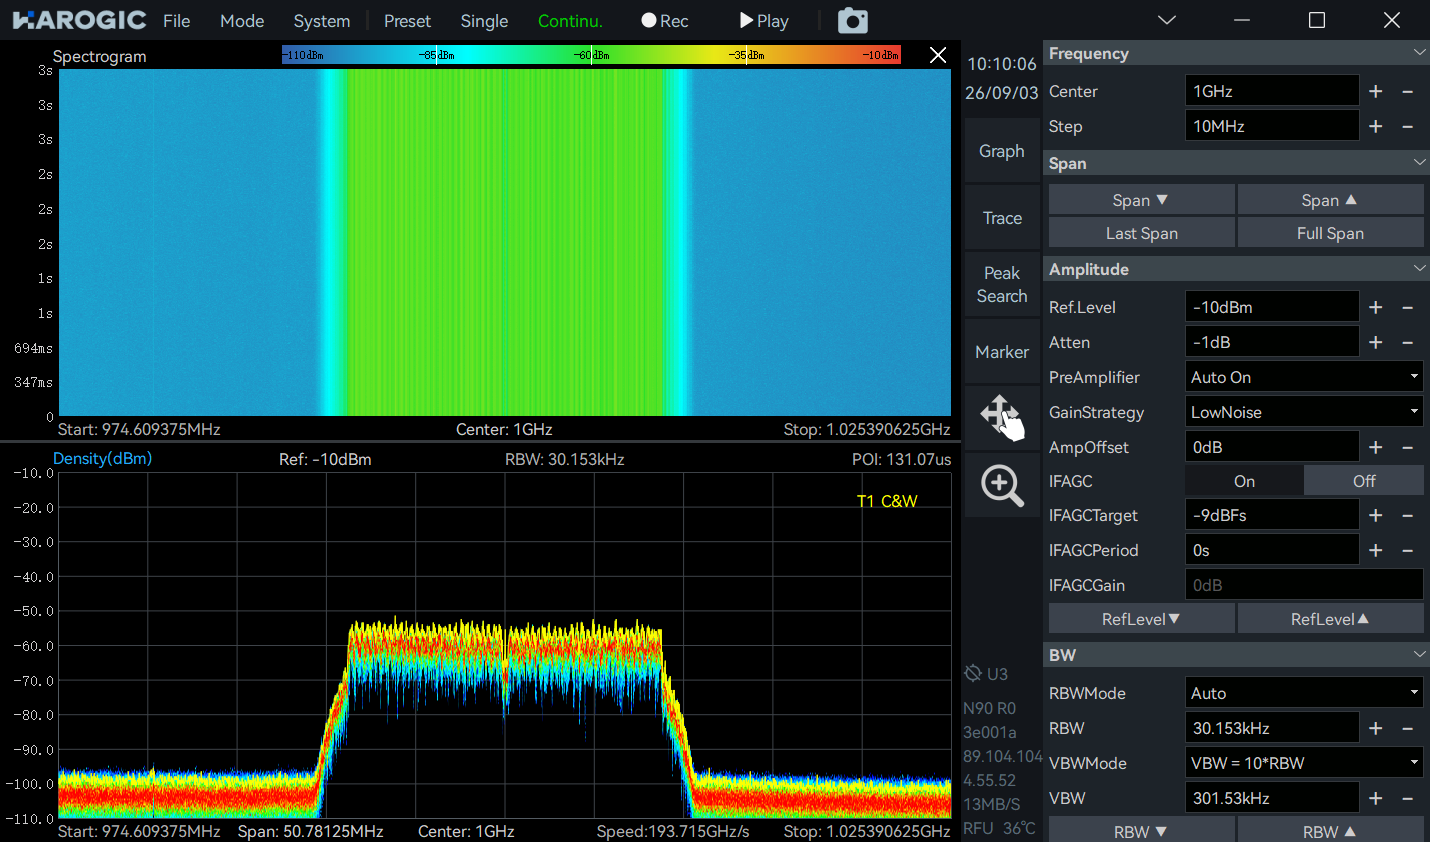
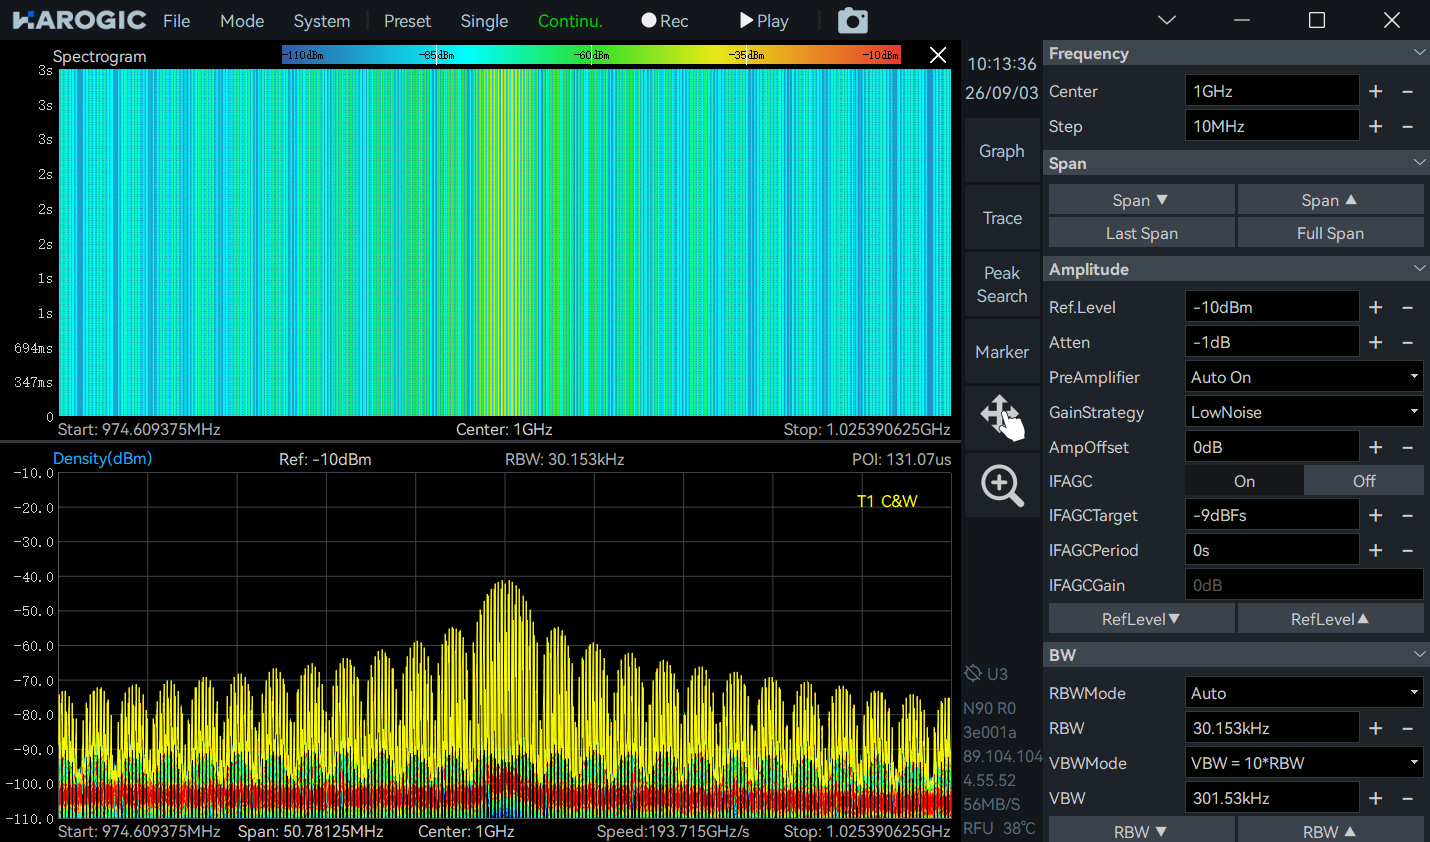
For a pulsed signal, select Pulse in the mode panel on the right. Set the pulse width to 500 ns, the period to 5 μs, and the duty cycle to 10%, then enable the RF output.
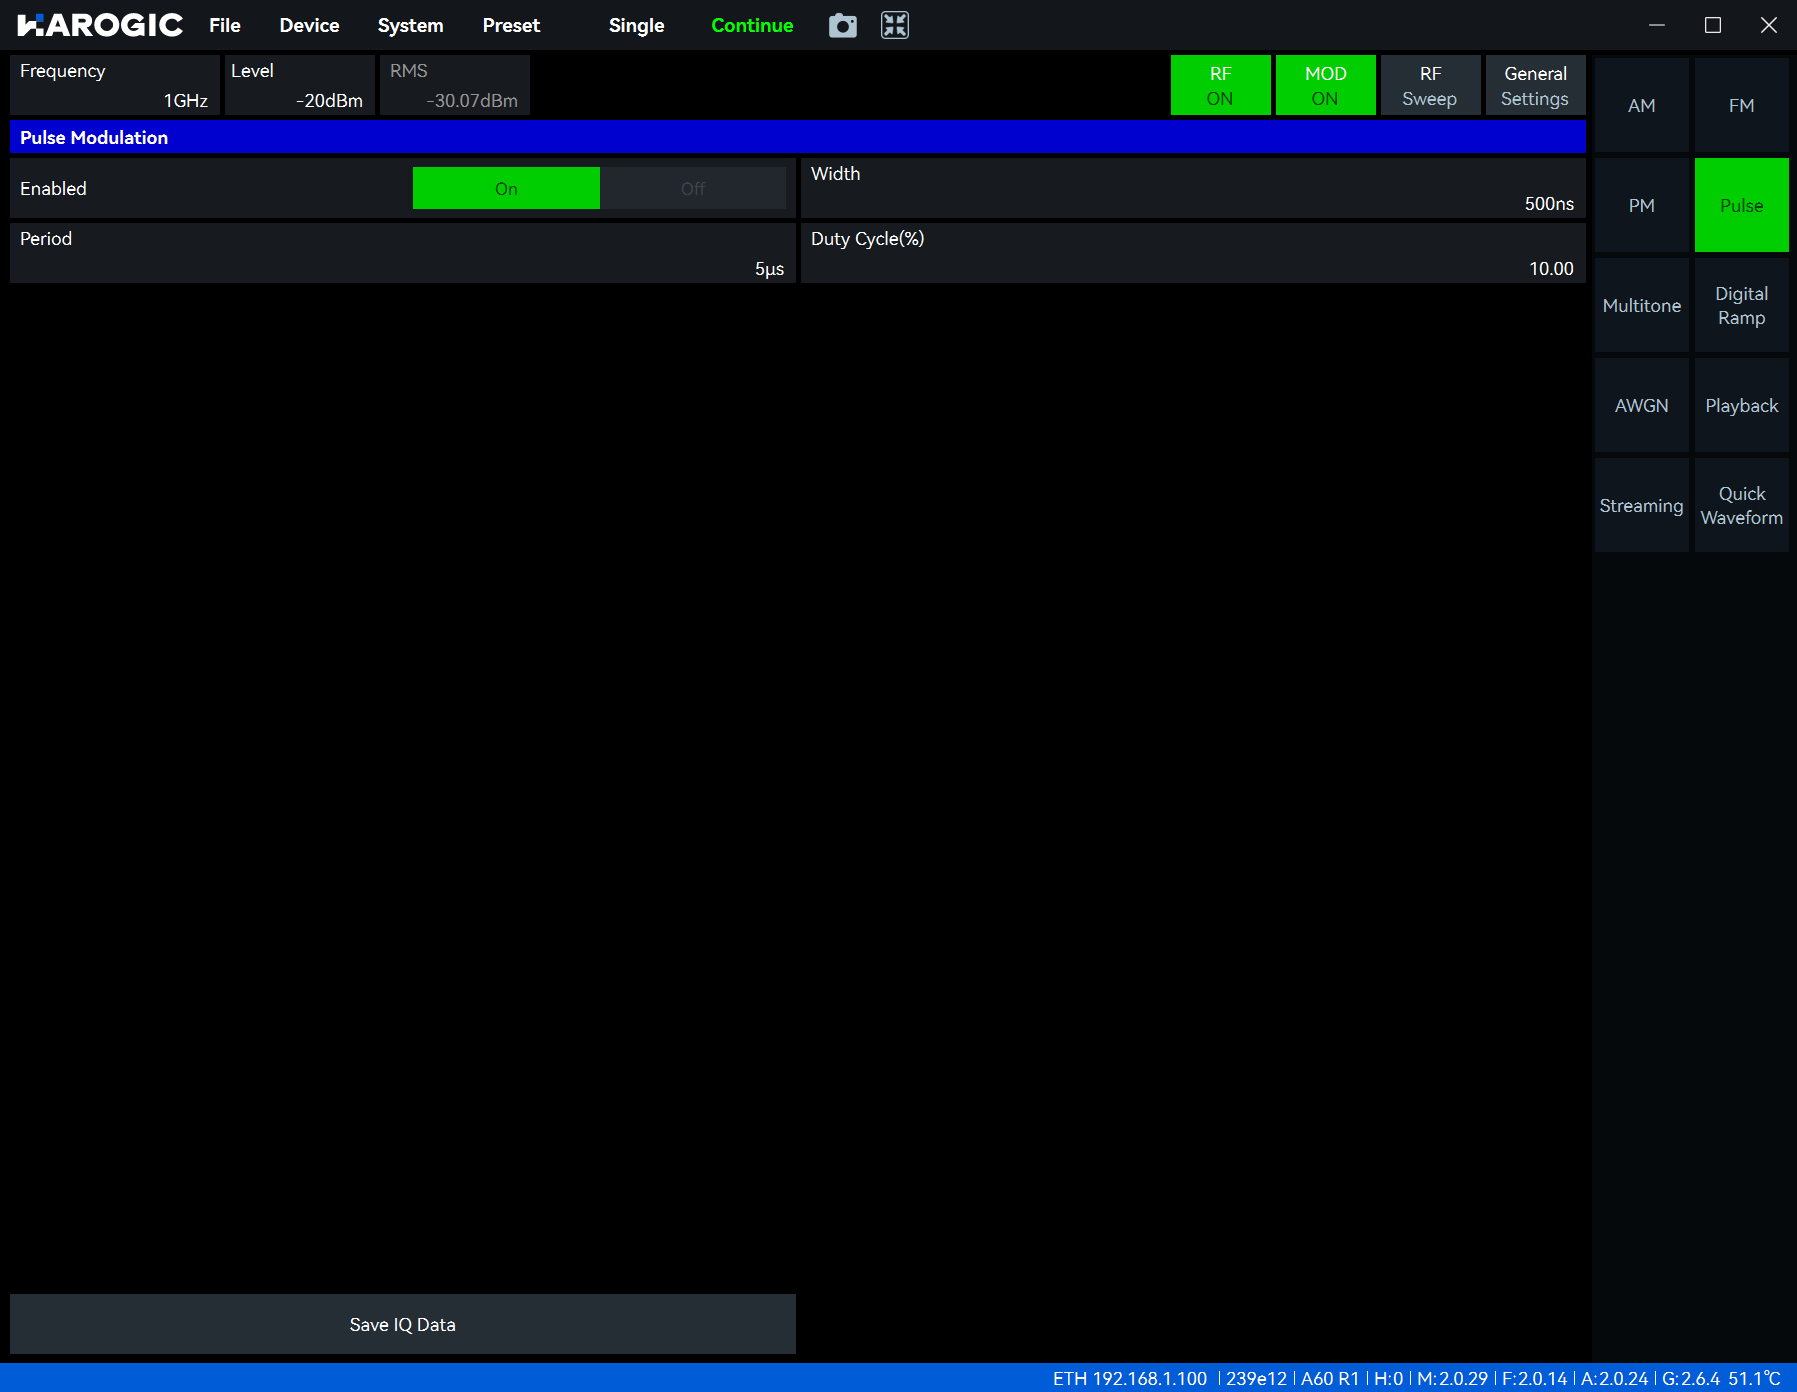
A typical result is shown below.
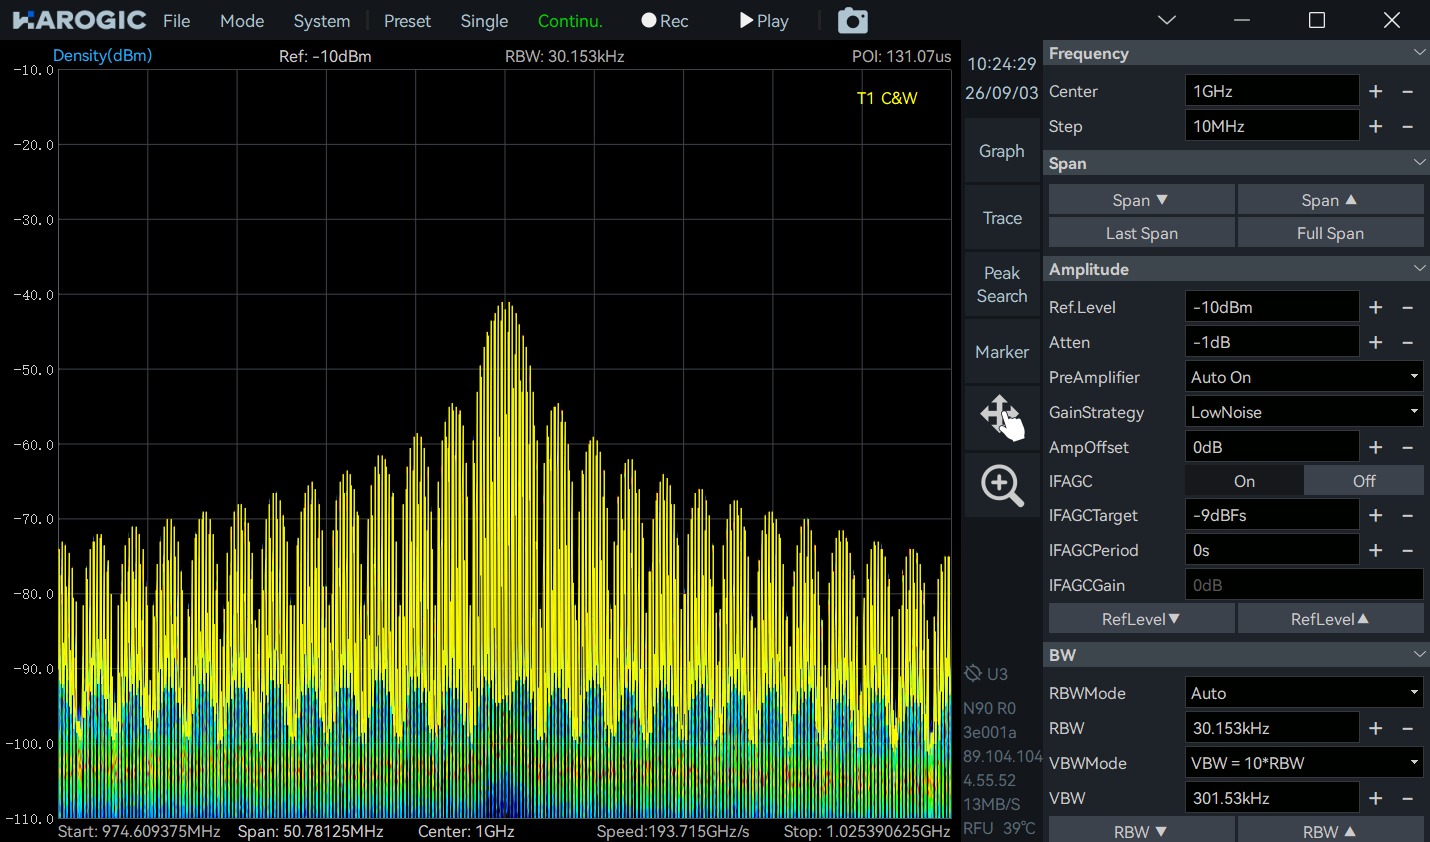
4.2.2 Observe the Signals with the Python Examples
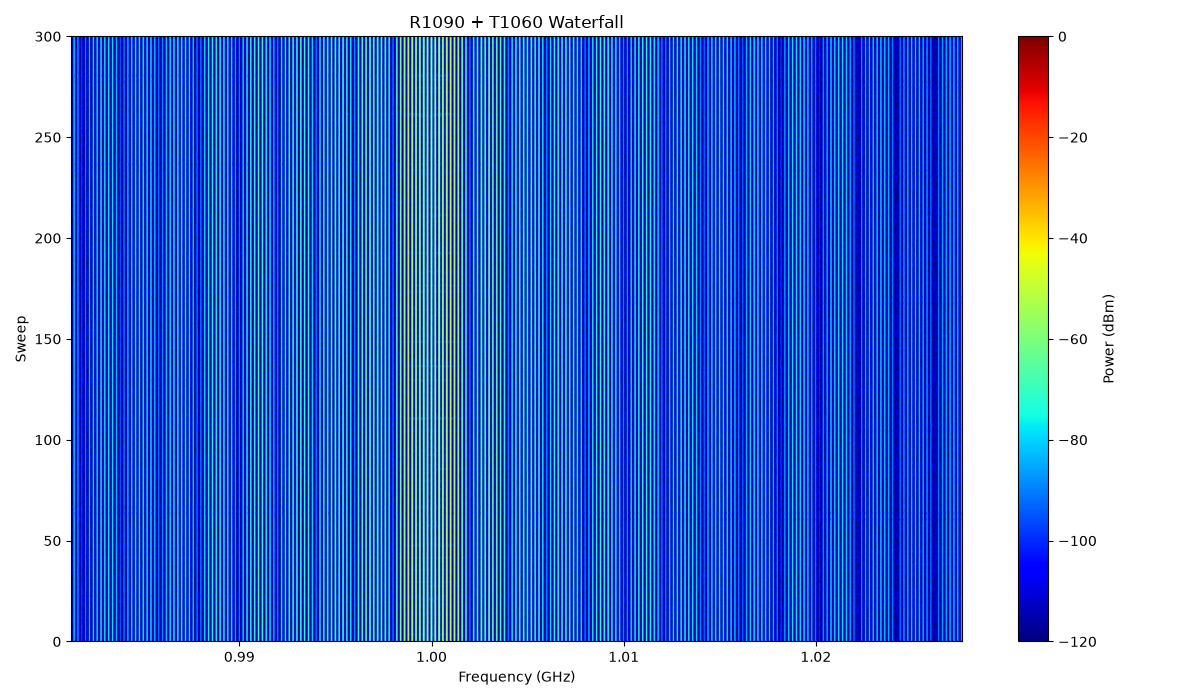
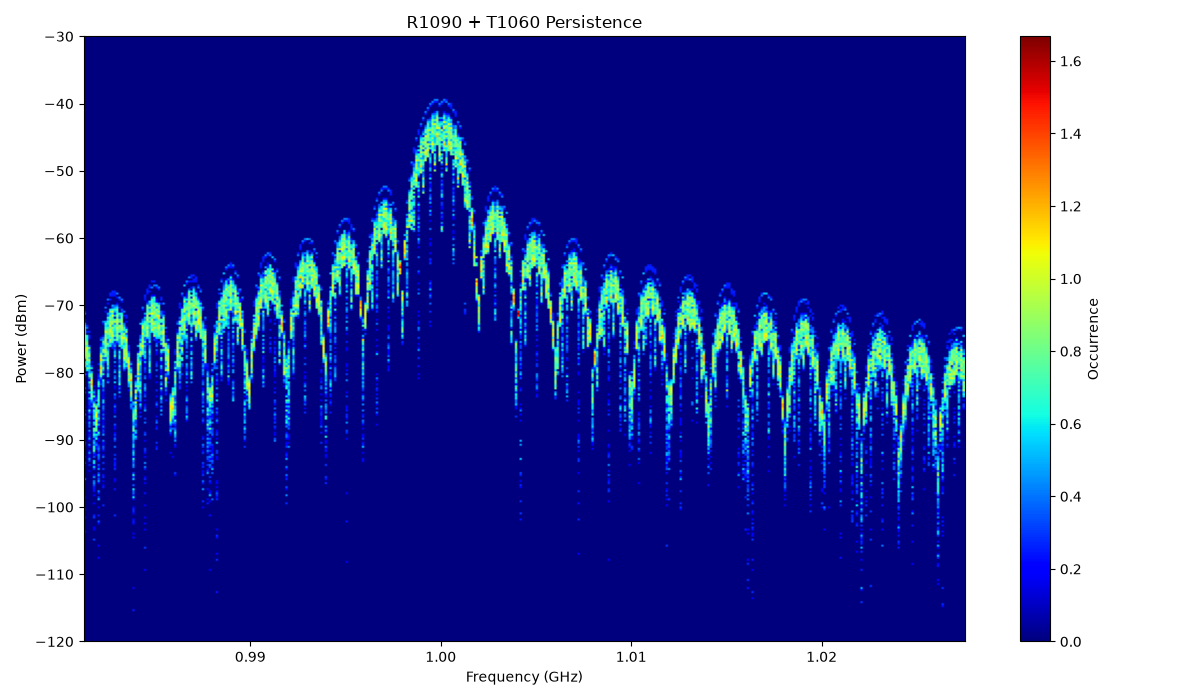
Run SWP_Waterfall_R1090_T1060.py and SWP_Persistence_R1090_T1060.py to display waterfall and persistence plots of the T1060 output.
In SGStudio, follow Section 4.2.1 and select the Bluetooth waveform file. Run SWP_Waterfall_R1090_T1060.py and SWP_Persistence_R1090_T1060.py separately to observe the signal.
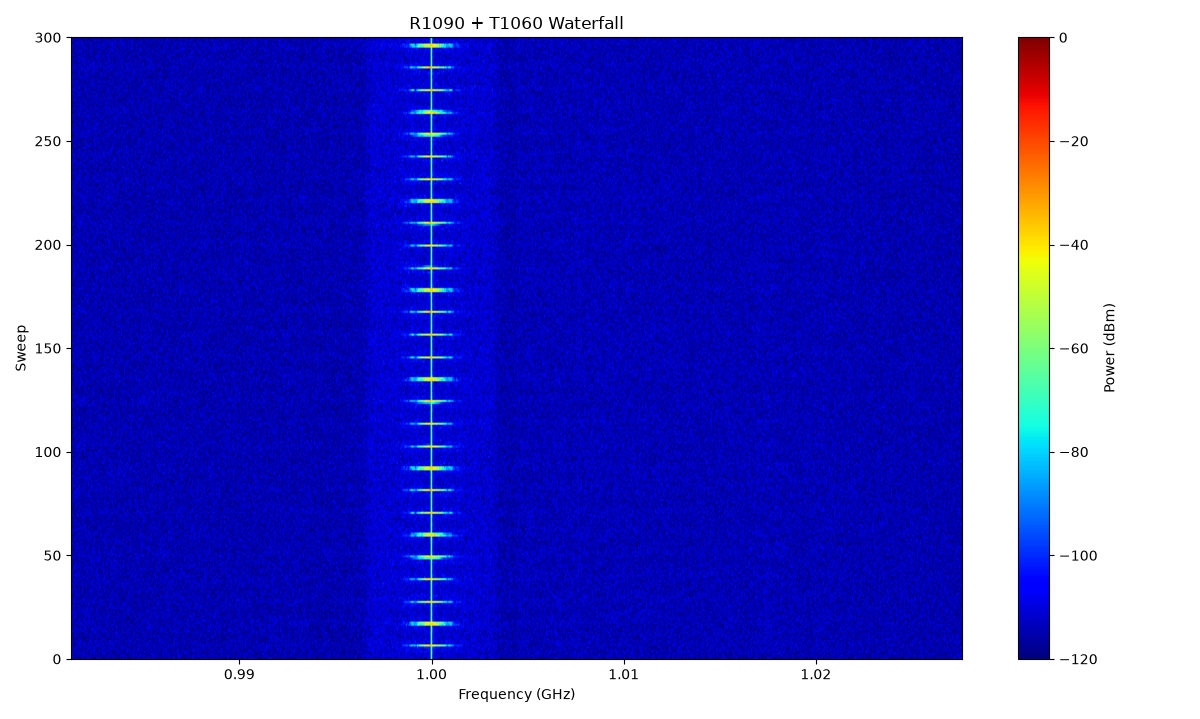
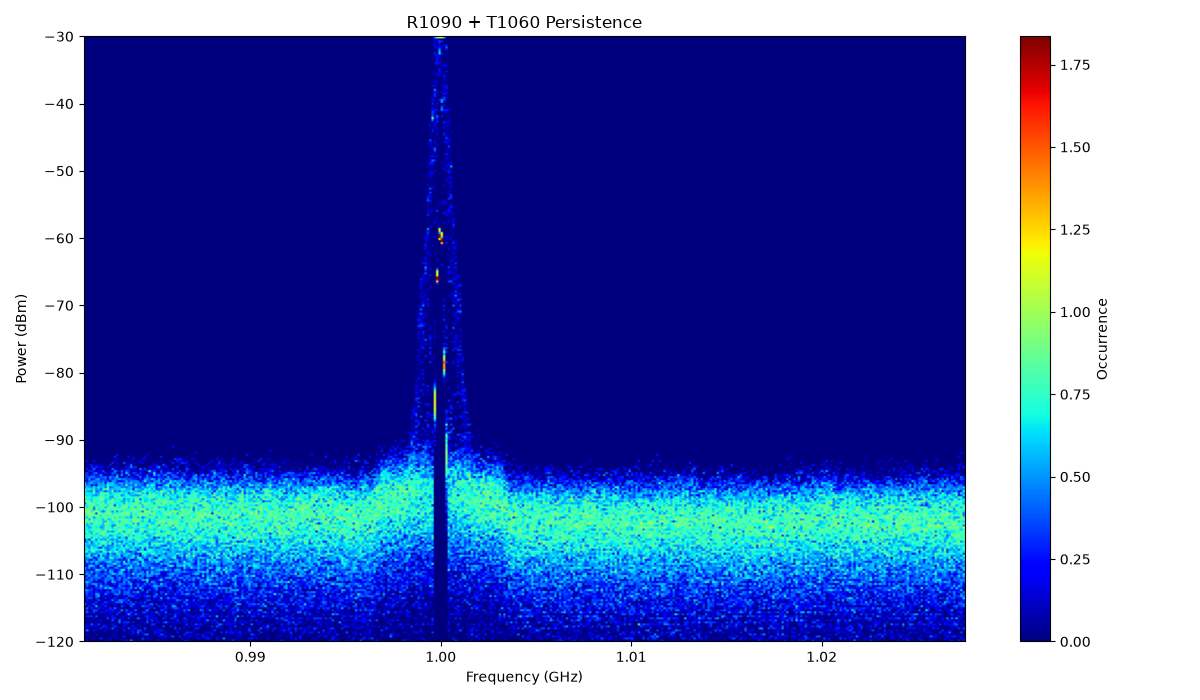
Select the Wi-Fi waveform file, then run each script.
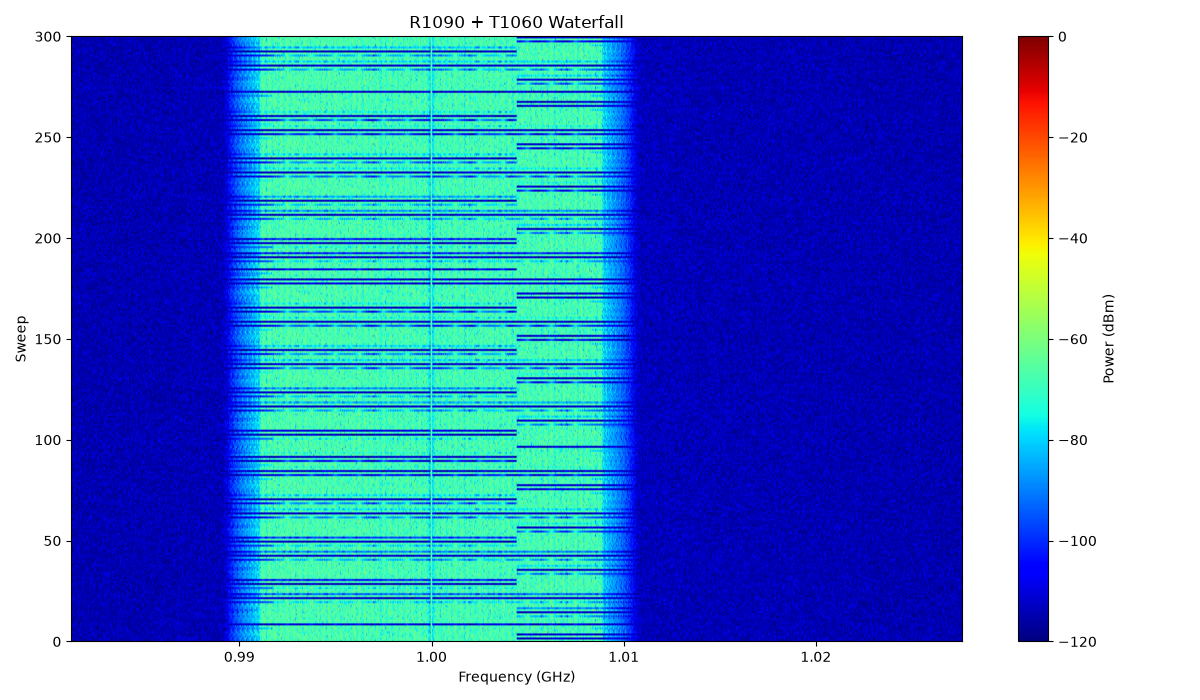
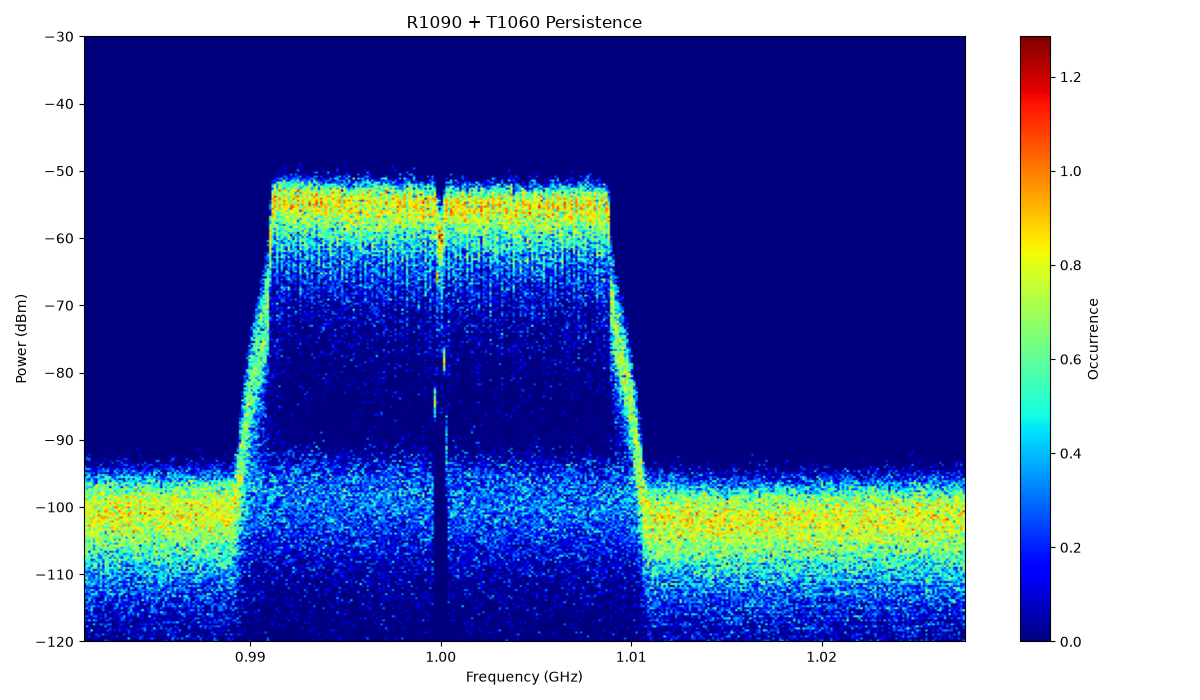
For the pulsed signal, set a pulse width of 500 ns, a period of 5 μs, and a duty cycle of 10%, then run each script.
Related Documentation
| Document | Description |
|---|---|
| HAROGIC R1000 Series RF Receiver Quick Start Guide | Power on and connect the receiver to a network, access the embedded host, connect the control software, view RF signals, and run the first IQ software example in 30 minutes. |
| HAROGIC R1000 Series RF Receiver User Manual | Complete R1000 user workflows covering interfaces, power, networking, desktop software, IQ acquisition, GNSS, triggering, and cross-layer hardware/software troubleshooting. |
| HAROGIC SAStudio4 User Guide | Complete SAStudio4 software guide covering general measurement modes, menus, and advanced analysis features. |
| HAROGIC HTRA API Programming Guide | API concepts, sessions, modes, parameters, data structures, error codes, timestamps, synchronization, and triggering. |
| HAROGIC HTRA API Examples Guide | Example directories, environments, build and run procedures, and language integration for C/C++, Qt, Python, MATLAB, C#, and LabVIEW. |
| HAROGIC T1000 Series RF Signal Generator Quick Start Guide | Power on and connect the generator to a network, access the embedded host, configure the hardware in the desktop software, and generate RF and modulated signals in 30 minutes. |
| HAROGIC T1000 Series RF Signal Generator User Manual | Complete T1000 user workflows covering interfaces, power, networking, desktop software, hardware configuration, RF signal generation, GNSS, triggering, and cross-layer hardware/software troubleshooting. |
| HAROGIC SGStudio User Guide | Complete SGStudio software guide covering device configuration, functional verification, modulated signal generation, custom waveform playback, and all signal generation modes. |
 Back to Cooperation